The HPE Aruba Networking ArubaOS 8 GUI configuration example shows the configurations steps for an ArubaOS setup leveraging an HPE Aruba Networking Mobility Conductor to manage multiple HPE Aruba Networking controllers/controller clusters. For HPE Aruba Networking standalone controller setups the same configuration settings apply but are directly configured in the corresponding HPE Aruba Networking Mobility Controller settings instead of the Mobility Conductor "Managed Network" configuration hierarchy. Furthermore, HPE Aruba Networking standalone controller setups do not provide any IoT dashboard.
Configuration Steps
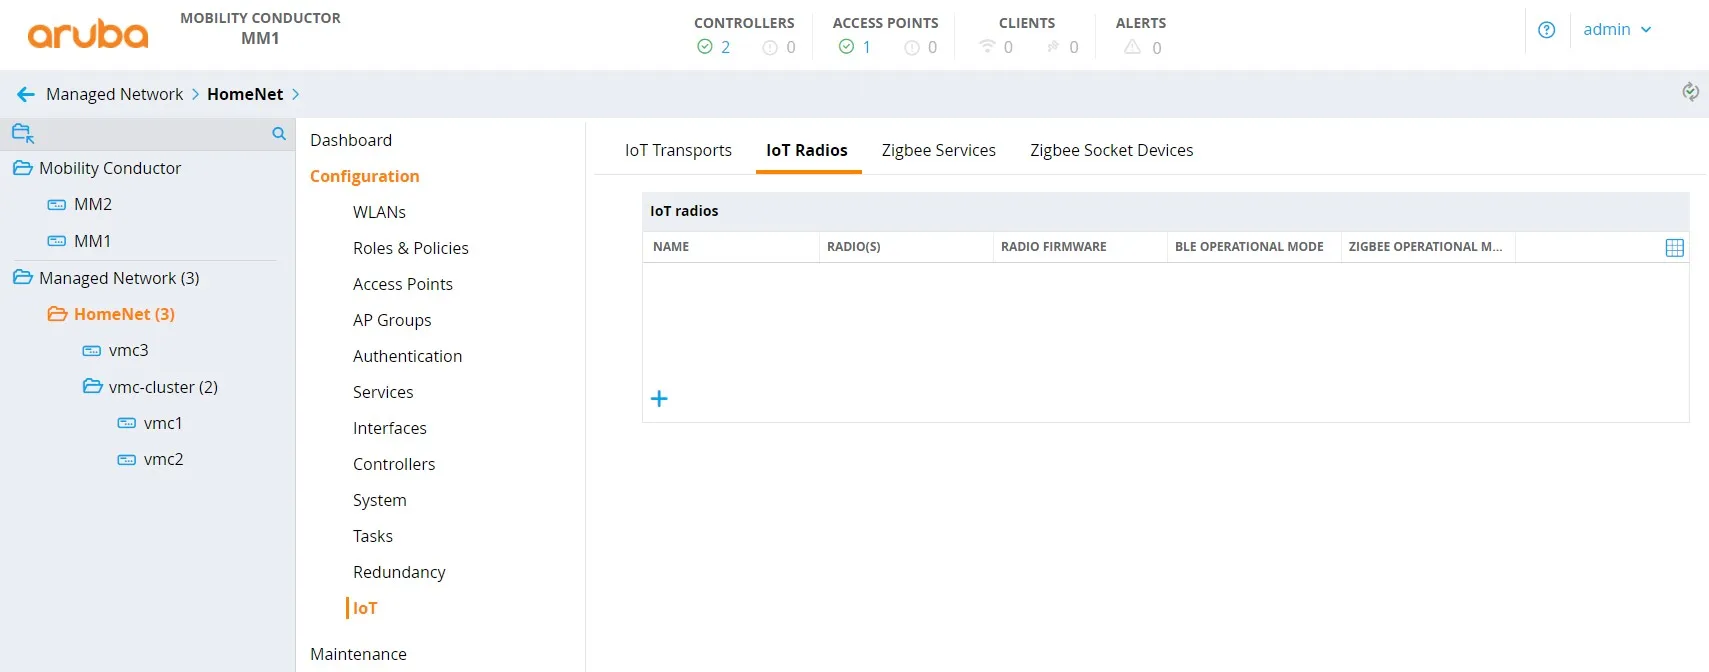
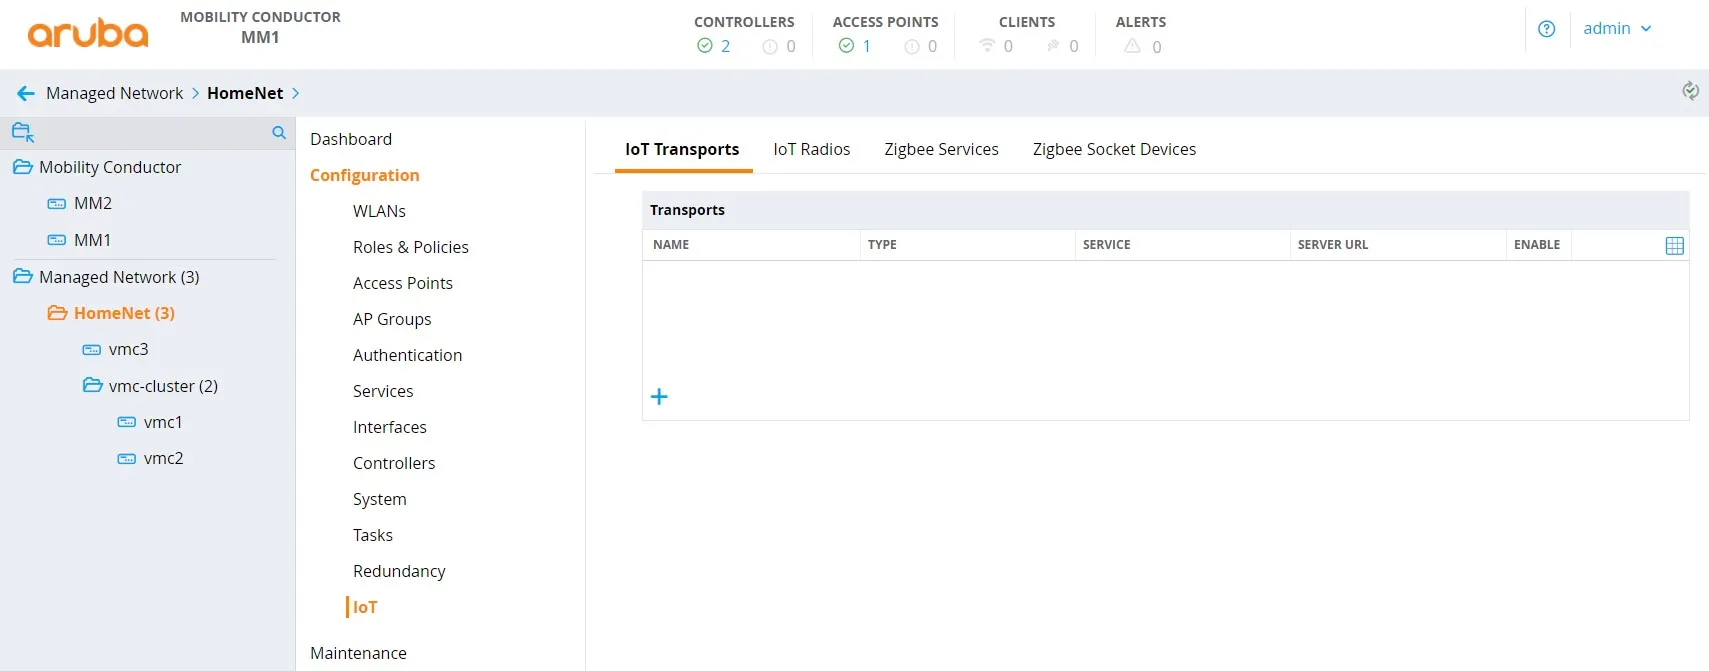
Section titled “Configuration Steps”- Log in to the HPE Aruba Networking Mobility Conductor Web Interface
- Select the desired device or device group under Managed Network. In the menu go to Configuration > IoT to open the IoT settings page.
- Add a new IoT radio configuration or change an existing one to enable the BLE mode of the HPE Aruba Networking AP's IoT radio:
- a. Click on the + icon in the IoT radios sub menu to add a new IoT radio profile.
- b. Enter a profile name.
- c. Select the desired radio.
- d. Set the radio mode to BLE.
- e. Set the BLE operational mode to both.
- f. Set the AP's BLE console mode to the desired state.
- g. Set the tx power to desired value, default is 0. This setting is only relevant when using BLE advertisements sent by the AP.
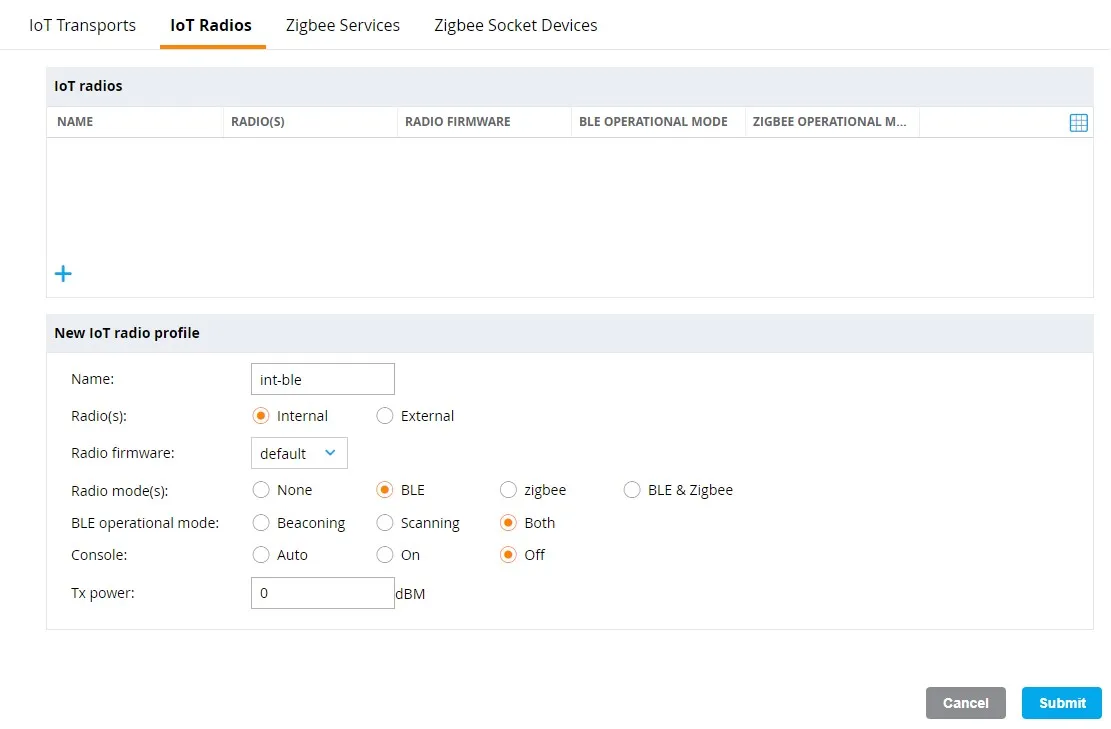
- h. Click Submit to add the new IoT radio profile to the configuration.
- Apply the IoT radio configuration to the desired AP group(s):
- a. In the settings menu go to Configuration > AP Groups and select the desired AP group to apply the IoT radio configuration to
- b. Click on IoT to open the IoT sub menu.
- c. Select the previously configured IoT radio profile for the internal or external BLE radio and click Submit to apply the profile.
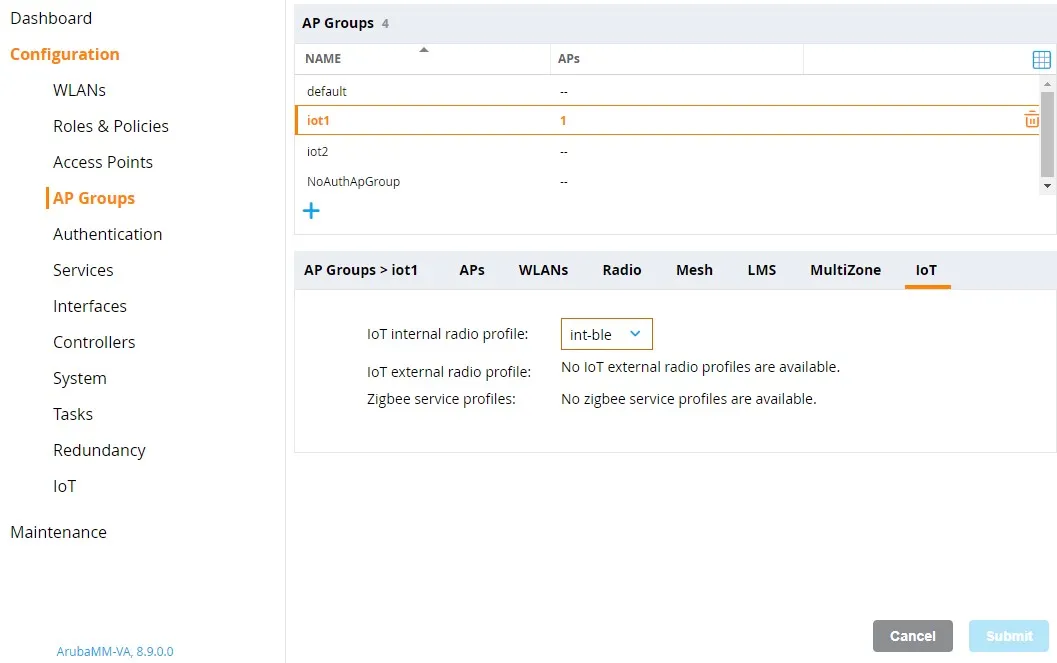
- d. (optional) Repeat steps 1-3 for any additional AP groups to be configured.
- Add a new IoT transport profile to configure the connectivity to the HYPROS solution backend:
- a. Select the desired device or device group under Managed Network. In the menu go to Configuration > IoT to open the IoT settings page.
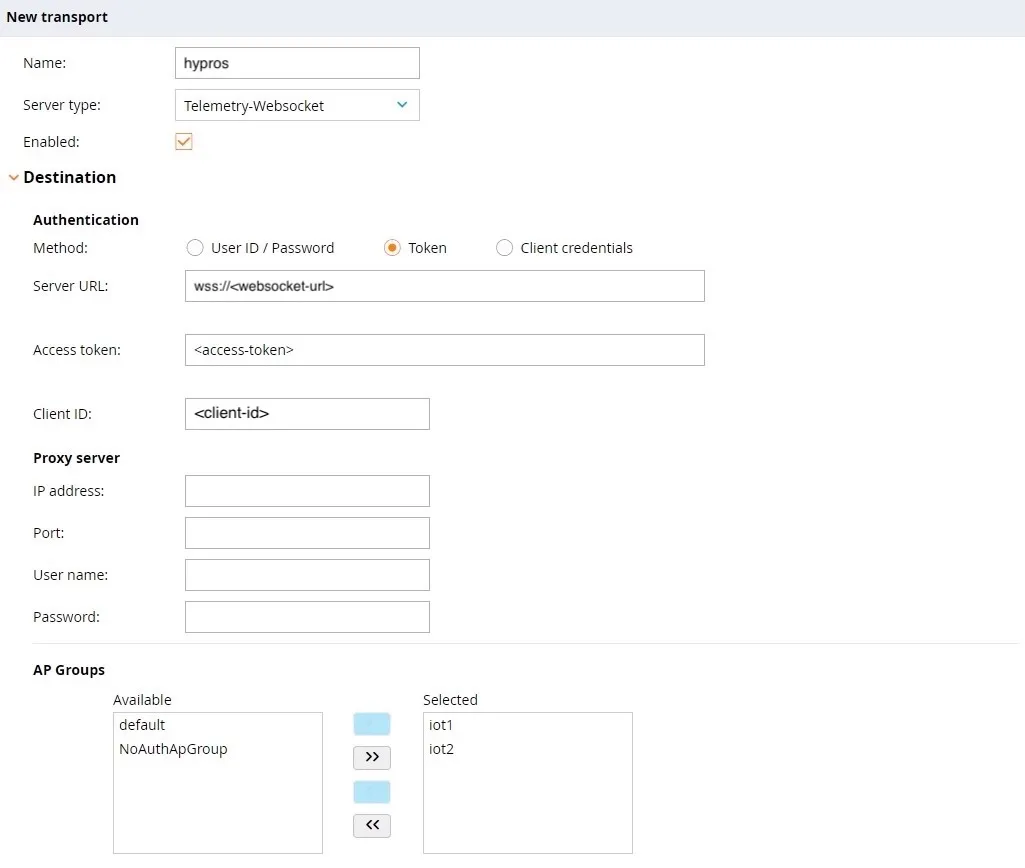
- b. Click on the + icon in the IoT transports sub menu to add a new IoT transport profile.
- c. Enter a profile name.
- d. Set server type to Telemetry Websocket.
- e. Set the State switch to enabled.
- f. Enter <serverURL> as server URL.
- g. In the destination section, select token as authentication method.
- h. Enter the access token provided for your HYPROS account.
- i. Select the AP groups the IoT transport profile should be applied to.
- j. Enter the client id provided for your HYPROS account.
- l. Select BLE Data as transport service.
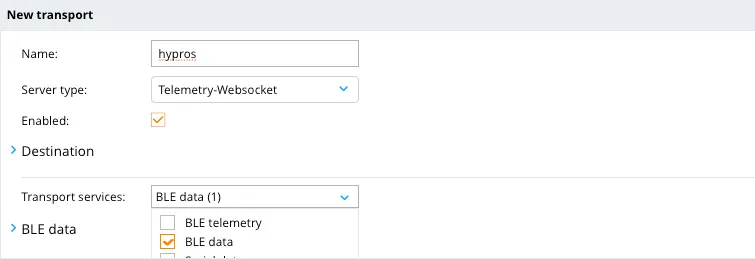
- m. Select iBeacon, EddyStone and Minew under BLE devices for the transport service BLE data.

- q. Click Submit to add the new IoT transport profile to the configuration.
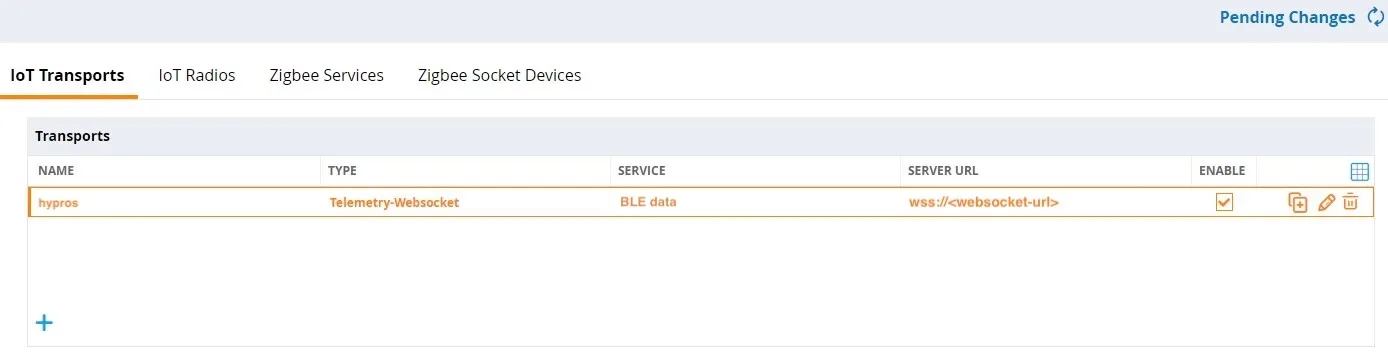
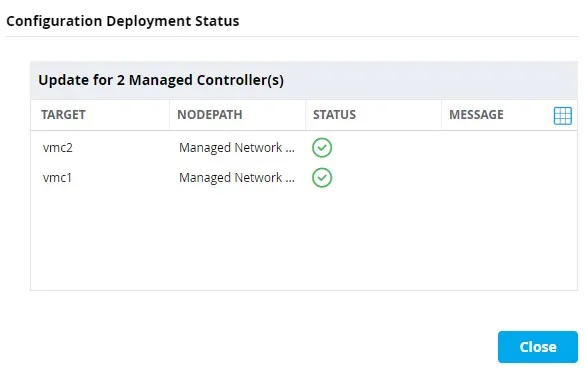
- Click on Pending Changes and in the pop-up dialog Deploy changes to save and activate the configuration changes.

- Wait until the configuration changes have been successfully deployed to all selected devices.